

|
Add New Administrative Users |
|

From
the  menu choose "Administrator
Security" from the drop-down menu.

Select
 at the end of the users list.
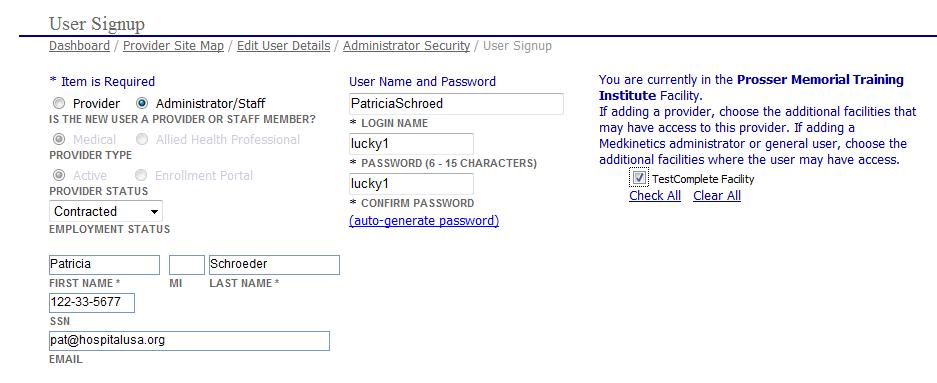
When "Add New User" is selected, the "User Signup" page is displayed. The * items are required for creating a login with the system. Other entries are optional. Note the area outlined in red will only be seen by multi facility users!
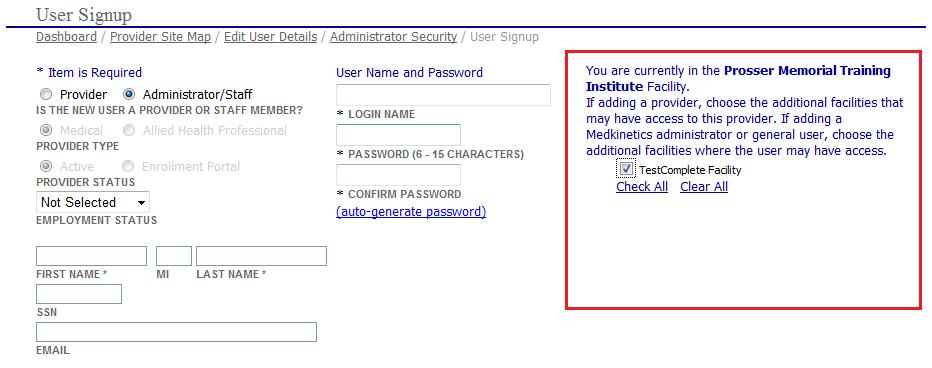
Choose "Administrator/Staff" by clicking the appropriate radio button. Upon doing so, the "Provider Type" and "Provider Status" fields are grayed out. Please Note: For Medkinetics Users that do not have Administrator Security access, only the Provider radio button will appear.
Enter the associate's first and last name in the fields provided. When this is done, a login name is automatically generated based on the name entries. The login name can be changed by retyping a new login name (15 character maximum).
Enter a password in the field provided. This password can be changed by the associate by using the "Change Password" function.
Retype the password in the confirm password field.
Enter the users social security number. Note: This is not a required field.
Enter an email for the user. Note: This is not a required field.
If applicable, choose
a profile from the drop-down. Predefined profiles are set up for each
facility. The system administrator can use predefined profiles to quickly
assign privileges to a user or group of users. The profile can be applied
and then changes can be made on an individual basis. Users also have the
ability to create their own facility specific profiles and save them for
future use.

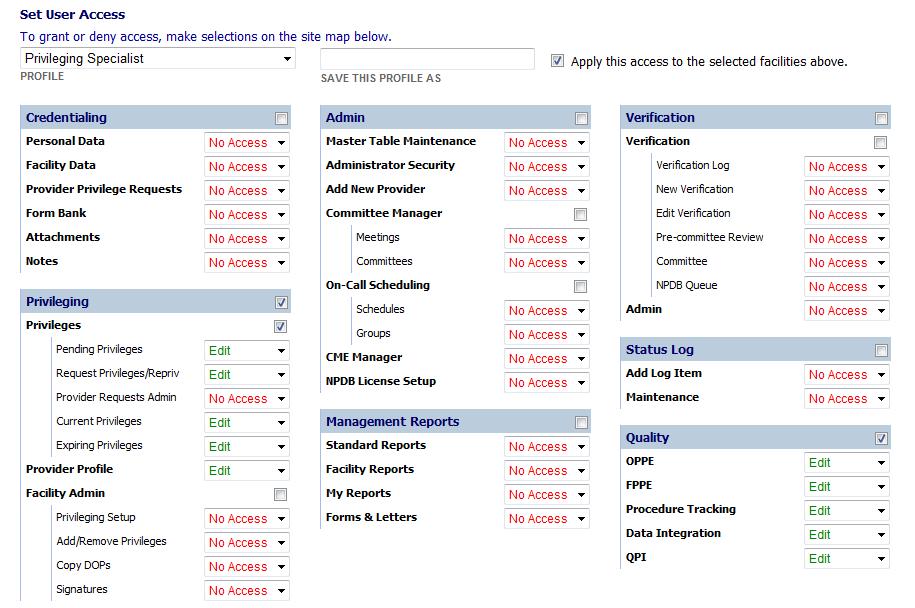
User access will change according to the chosen profile.
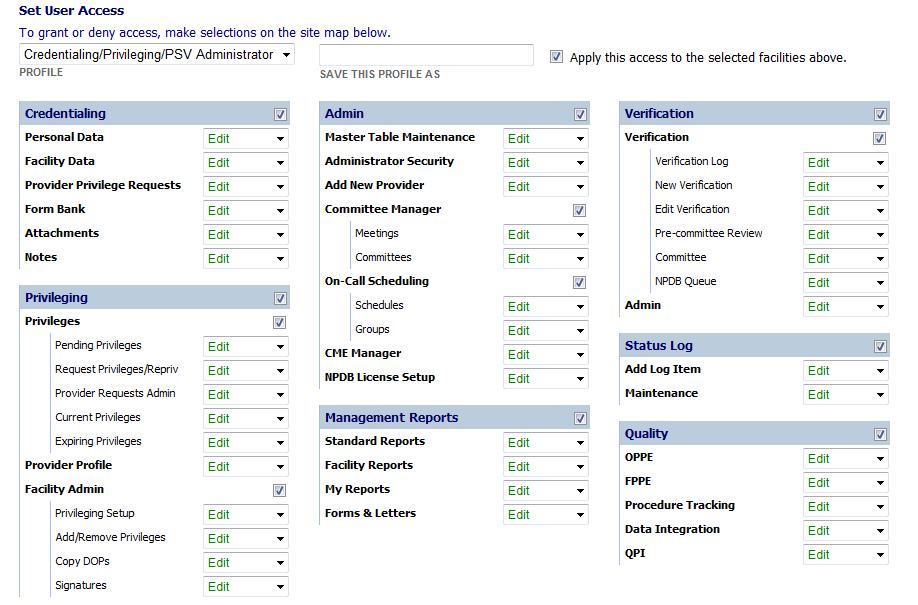
 Administrators have the option
of limiting each section of the application to their staff members. In
the Credentialing section, as well as in the Provider Profile section
under Privileging, there are 3 options listed:
Edit, View Only and No Access. All other sections of the user matrix only
have the Edit and No Access options.
Multi
facility users may duplicate user access by clicking 
If necessary, change a users individual access by selecting an option from the drop-down menu for the specific access.

In addition to the quick drop-downs, check boxes accompany each main menu item that can be used to eliminate access to an entire section. The check boxes are at the top right of the section.
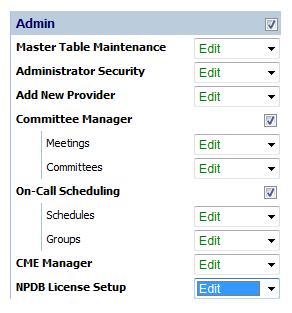
Remove the checkbox and each option in the section will be marked "No Access". Each individual item can still be changed but this is a quick way to eliminate access to an entire section.
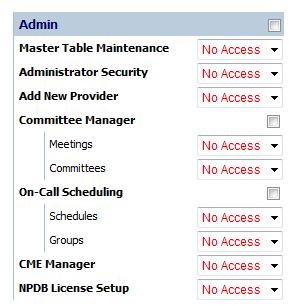

Re-marking the checkbox WILL NOT automatically change all the drop-downs back to 'Edit'. This functionality was designed to remove section access quickly.
If the
changes made reflect a new profile, type in the name of the profile in
the box provided.

This
is an example of how the "User Signup"
page should look completed. Note! that
a single facility will not have the additional facilities to choose from
or the  However,
all other fields remain the same.

After
changes are complete, click the  button to save the changes
to the system. If you created a new profile it will now be available in
the profile drop-down.
How To Allow Access To Add New Provider Form
From
the  menu choose "Administrator
Security" from the drop-down menu.

Find the user in the Staff list and click on the pencil icon to edit your access rights.
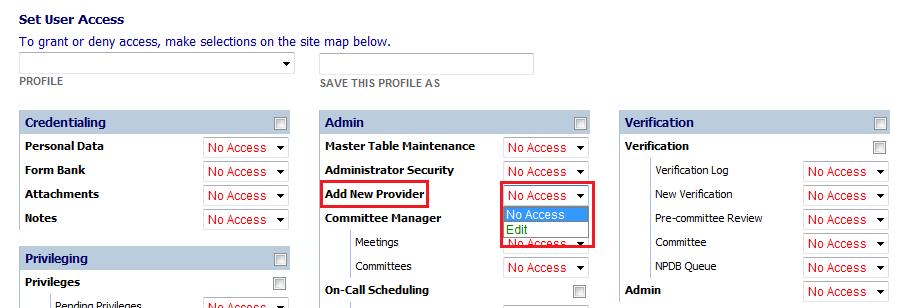
Change
Add New Provider from "No Access"
to "Edit" and click
 .
.
Managers: If you have not given your staff access to Administrator Security, YOU need to take the steps described above for each person who has permission to add new providers to the system.