
|
Request New Privileges/Re-Privilege |
|
The "Request New Privileges/Re-Privilege" option allows the specialist to add new privileges to a provider, re-privilege a provider or add privileges to a provider that currently does not have any privileges granted. The sections below detail the steps for each of these processes:
Adding a New Privilege or Re-Privileging Privileges for an Existing Provider
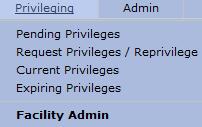
From the  section of the main menu, select "Request
New Privileges/Re-Privilege" from the drop-down menu.
section of the main menu, select "Request
New Privileges/Re-Privilege" from the drop-down menu.
The "Provider Search" page will open.

Enter
the applicable search criteria and select the button to
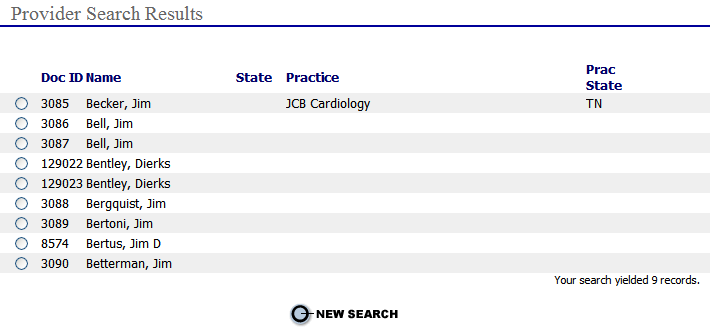
open the "Provider Search Results"
page.
button to
open the "Provider Search Results"
page.
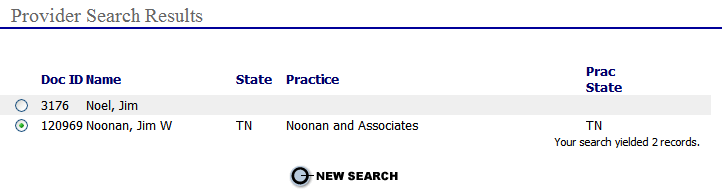
Select
the  radio button next to the provider's name to open the
"Add Privilege Request"
page.
radio button next to the provider's name to open the
"Add Privilege Request"
page.
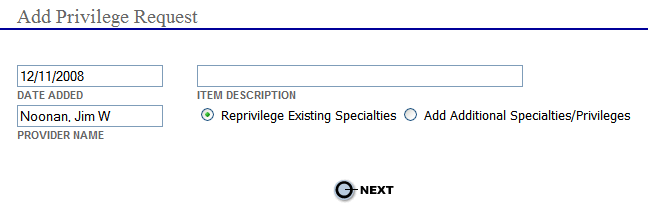
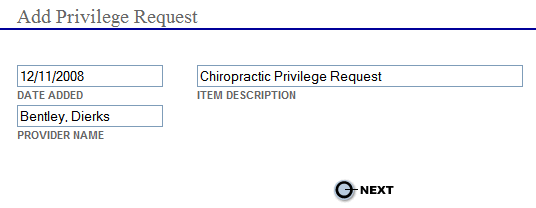
If this is the first request for a privilege the user will be taken directly to the "Specialties" page. Refer to the "Adding Privileges to a Provider that Currently Does Not have any Privileges Granted" section below.
If the provider currently has privileging specialties two radio buttons will display in the "Add Privilege Request" page. Select the appropriate radio button, type in an item description and click the Next button. Follow the steps below to "Re-privilege Existing Specialties" or "Add Additional Specialties/Privileges".
Reprivilege Existing Specialties
Once
the radio button next to "Re-privilege
Existing Specialties" is
selected the "Granted Privileges"
window is displayed. If
the facility’s version of a specialty DOP has been changed since the provider’s
last appointment period, and he is on the privileging log for reprivileging,
color-coded notes are shown next to the changes for each privilege in
his specialty.

GRAY: When a previously granted privilege has been removed from the DOP, it is shown in gray and there is no checkbox (it cannot be selected). A gray note explains that the privilege has been removed from the specialty.
GREEN: New privileges added to the specialty during the last privileging cycle but not pushed to the provider are displayed in green. Although the provider has not had the privilege previously, it is easy to add it to his requested privileges as the box will be checked by default.
RED: A red note means that the verbiage of the privilege has changed.
BROWN: Privileges that have been included in the specialty previously but were not granted during the last appointment period are shown in brown.
 When a privilege is moved from core to special or special
to core, it is marked in gray where it was removed and is marked in green
where it was added.
When a privilege is moved from core to special or special
to core, it is marked in gray where it was removed and is marked in green
where it was added.
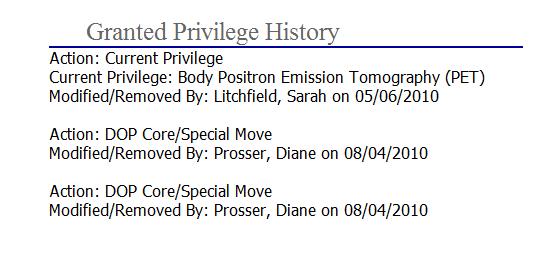
When requesting privileges for a provider, a blue splat icon next to the color-coded notes opens a Granted Privilege History
window for that privilege. The Granted Privilege History window lists
all changes and the date and username of the person who made each change
to the DOP.
The details tracked in Granted Privilege History represent a significant change in the database that allows for reports to be written that will show a provider’s granted privileges at needed points in time as well as audit reports for changes to privilege delineations.
.
If the privilege is blue, it is a hyperlink to open the criteria for that privilege.
To re-privilege all the privileges listed select the "Check All" button, or select "Clear All" and check only the privilege(s) you wish to re-privilege. You may also click the "Check All" button as well as the "Save and Add Additional Privileges" button. The "Specialties" window is displayed.
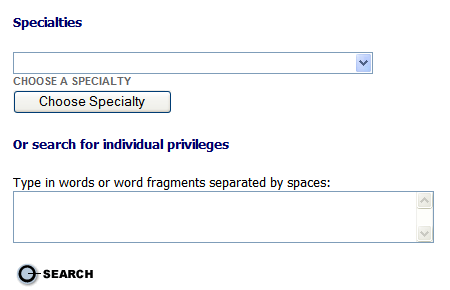
Choose a specialty
from the drop-down menu and enter the applicable search criteria for the
privilege to be added and select the button to open the
search results page.
button to open the
search results page.
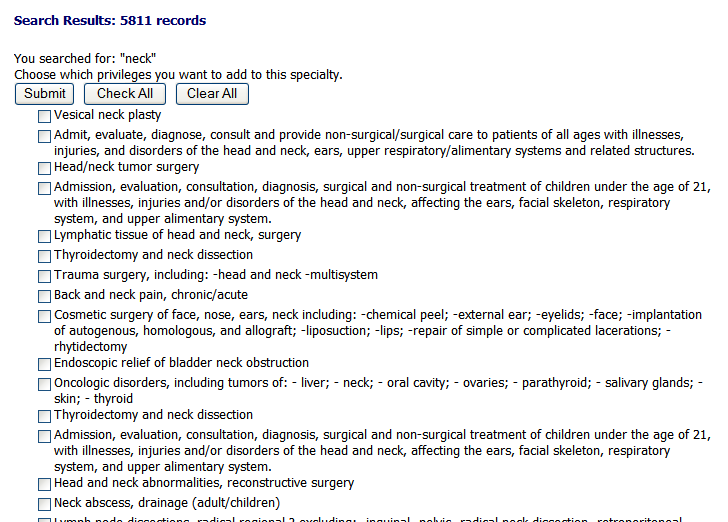
Select the check box for the specialties then click the Submit button. To reach the bottom of a long list press Control and End on your keyboard at the same time. The follow question displays.

Choose the Yes or No radio button. You will be taken back to the "Specialties" menu to add any additional specialties if Yes is selected.
Add Additional Specialties/Privileges
Select
the applicable radio button next to "Add
Additional Specialties/Privileges"
and click the Next
button to open the "Specialties"
window.
Choose a specialty
and enter the applicable search criteria for the privilege to be added
and select the button to open the search results page.
Select the check box for the specialties then click the Submit button. To reach the bottom of a long list press Control and End on your keyboard at the same time.
Select the check box for the specialties then click the Submit button. The follow question displays.
Choose the Yes or No radio button. You will be taken back to the "Specialties" menu to add any additional specialties.
Adding Privileges to a Provider that Currently Does Not have any Privileges Granted
From the menu drop-down select "Request
New Privileges/Re-Privilege" to open the "Provider
Search" page.
Enter
the applicable search criteria and select the button to
open the "Provider Search Results"
page.
Select the radio button next to the provider's name to open the " Add Privilege Request" page.
Enter or update all
applicable information and select the button to open the
"Privilege Request"
list.
button to open the
"Privilege Request"
list.
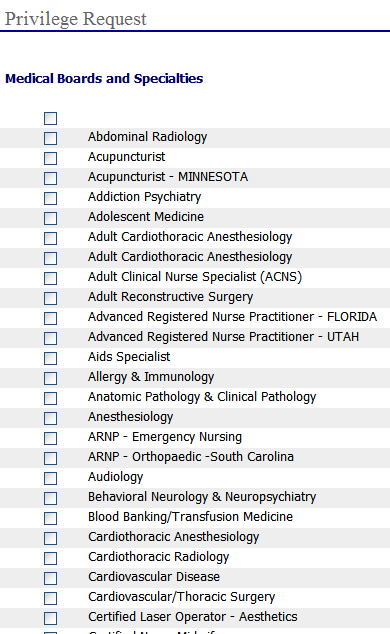
Select the
 next to each board and/or specialty that applies to
the new privilege request. Click the "Get
Privilege List" button at the bottom of the page. The "Privilege Request" information
page will open list the chosen specialties criteria.
next to each board and/or specialty that applies to
the new privilege request. Click the "Get
Privilege List" button at the bottom of the page. The "Privilege Request" information
page will open list the chosen specialties criteria.

Review the list and
then scroll to the bottom of the page and select the  button
to save the information
and return to the main "Privilege
Requests" page, as shown
below, with the new provider and privilege information added.
button
to save the information
and return to the main "Privilege
Requests" page, as shown
below, with the new provider and privilege information added.
