
|
Adding Certifications |
|
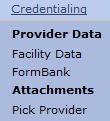
Select the  option from the main menu.
From the drop-down
menu select "Provider Data".

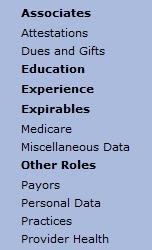
From the "Provider Data" drop-down, select “Certifications” from the "Expirables" option.

The “Certifications” list for the provider is displayed.

Select the  button
to open a new “Certifications”
page.

The Certification form is flexible, in that the Type select box is a dynamic list of the unique options that exist in the provider Certification data. Use Add New to describe a certification type, e.g. BLS. When the form has been saved for the first provider, BLS will be in the drop-down list for the next provider. Certification Issuer is also a dynamic drop-down box.

 Like
most EPR provider data where more than one item may be entered, certificates
may be marked inactive to keep historical data out of expiration reports
and forms and letters. To
delete an erroneous entry, make it inactive first, then delete using the
red X icon
  .
.
Life Support Audit Report
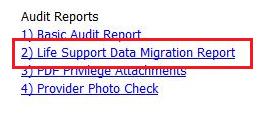
A report named "Life Support Data Migration Report" can be found under Standard Reports and will show each provider's life support certificates side by side - what was found on the Personal page and what is now found on the Certifications page. Use the audit report to check your data, especially if you had entered new data on the Certifications page and had legacy data on the Personal page.
Select the  section of the main menu and select "Standard
Reports" from the drop-down menu.
Select "Life Support Data Migration Report"

Provider Certifications Reports
There are two new reports under Provider Certification Reports with many filters to provide the data set needed to see all certifications, just some, or to view certifications by expiration date range.
Select the  section of the main menu and select "Standard
Reports" from the drop-down menu.
Select "Provider Certification Report" or "Provider Certification Report with Exp Date Range"
