
|
Privileging Setup |
|
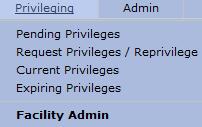
To access Privileging
Setup, go to the  section and select "Facility
Admin" from the drop-down menu.
section and select "Facility
Admin" from the drop-down menu.
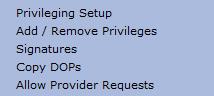
Select "Privileging
Setup" from the "Facility
Admin" drop-down menu.
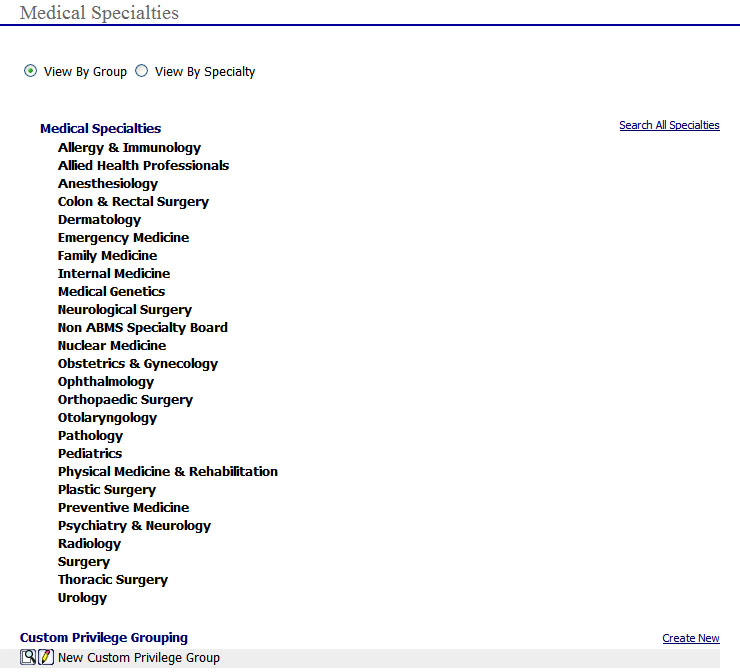
The "Medical Specialties" list is displayed. To view the subspecialties listed, click on a Medical Specialty.
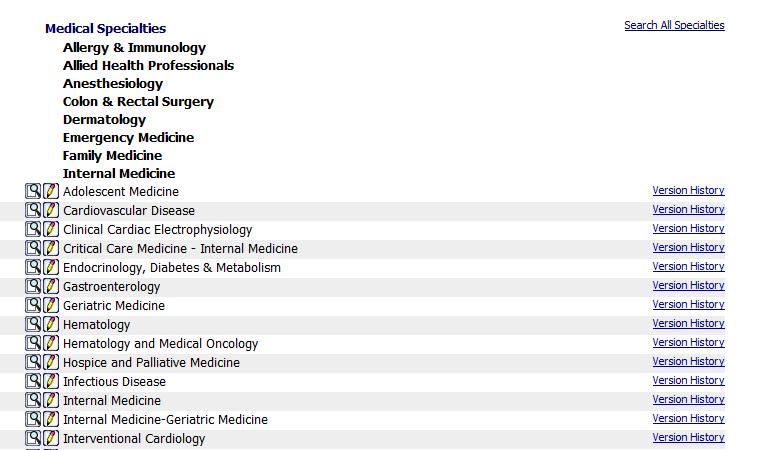
The "Medical Specialties" page displays a list of the current medical specialty privileges setup for the facility/hospital. The default list view is "View By Group".
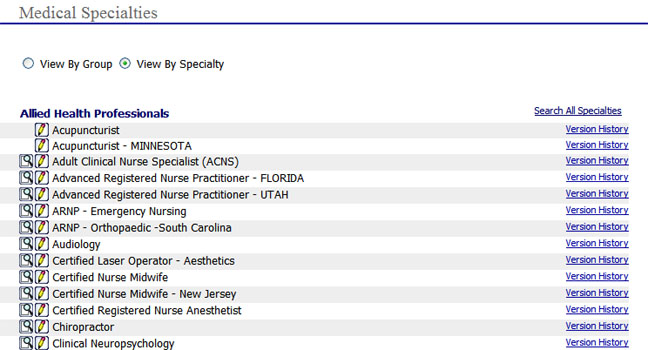
View by Specialty
To view the "Medical Specialties" page by specialty select the "View By Specialty" radio button and the "Medical Specialties" page will be displayed.
Version History
The
version history for each privilege can be view by selecting the  link to the right of each privilege. When
selected the "Privilege Version
History" page will be displayed as shown below:
link to the right of each privilege. When
selected the "Privilege Version
History" page will be displayed as shown below:
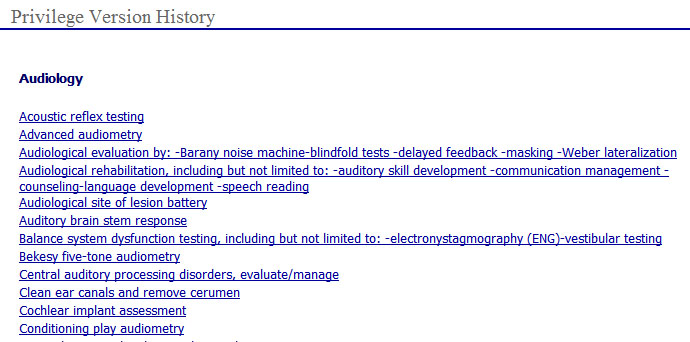
To view the details of the version history left-click on the version description, as shown above, to open the "Privilege Version History" page as shown below that details the following information:
"OLD" value
Version date
Version number

Viewing Privileges
The
"Medical Specialties"
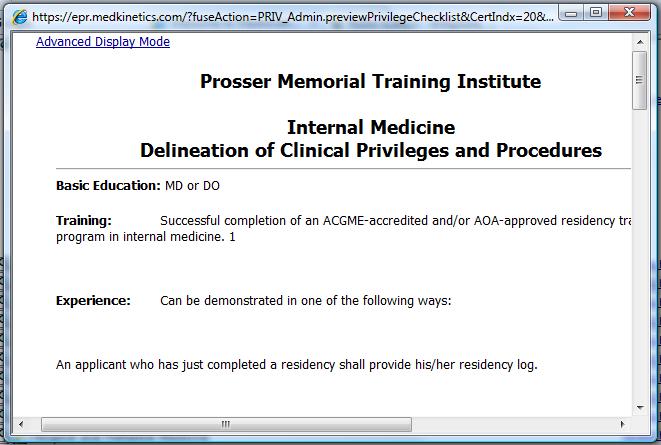
page allows the user to view an existing privilege. To
view an existing privilege select the  preview icon next
to the privilege name to open the window
as shown below. To
print the privilege list, scroll to the bottom of the page and select
the
preview icon next
to the privilege name to open the window
as shown below. To
print the privilege list, scroll to the bottom of the page and select
the  button to print.
Editing Privileges
The
"Medical Specialties"
page allows the user to edit an existing privilege. To
view an existing privilege select the  create/edit icon
next to the privilege to open the "Privileges
by Specialty" page as shown below. (For details on
adding and editing privileges go to Hospital
Facility Setup ).
create/edit icon
next to the privilege to open the "Privileges
by Specialty" page as shown below. (For details on
adding and editing privileges go to Hospital
Facility Setup ).

Privileging involves performing the following steps:
Setting Up Medical Boards and Specialties for your Facility
The EPR Privilege system has a pre-loaded default set of Medical Boards and their respective Board specialties. The system allows the Administrator to modify the Privilege information for each Board and Board Specialty to suit the hospital/facilities unique requirements. The following steps detail the process for setting up Medical Boards and Specialties for a Hospital/Facilty:
If applicable for the hospital/facility update the following fields:
"Basic Education" - update the basic education requirements for the privilege
"CME" - enter or update the Continuing Medical Education (CME) requirements for the privilege
"CE" - enter or update the Continuing Education (CE) requirements for the privilege
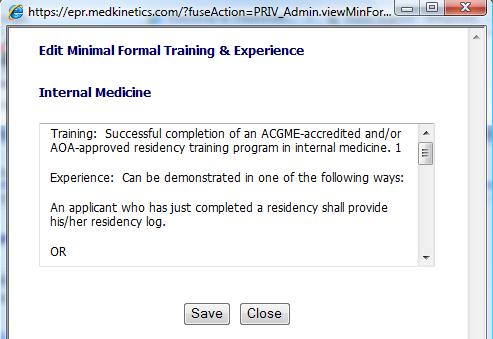
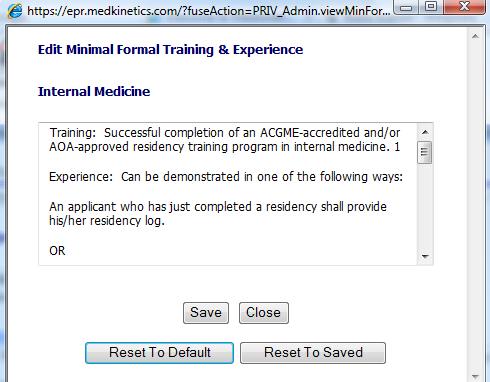
Editing Minimal Formal Training & Experience
In the "Minimal Formal Training & Education / Specialty Description" section of the page, update or enter the information that applies to the hospital/facility
Select
the  link to open the "Edit
Minimal Formal Training & Experience" window.
link to open the "Edit
Minimal Formal Training & Experience" window.
Make
all necessary changes and select the  button to accept
the changes. It
is recommended to enter the date and initials of the specialist making
the changes. Once
the changes are saved the page will refresh and the following options
will be available:
button to accept
the changes. It
is recommended to enter the date and initials of the specialist making
the changes. Once
the changes are saved the page will refresh and the following options
will be available:
 - select to undo changes
 - reset and save changes
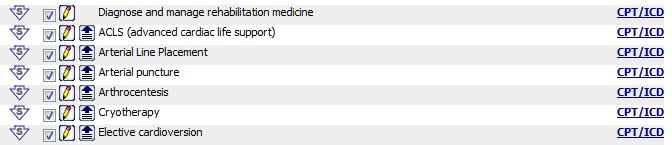
Editing Core Privileges
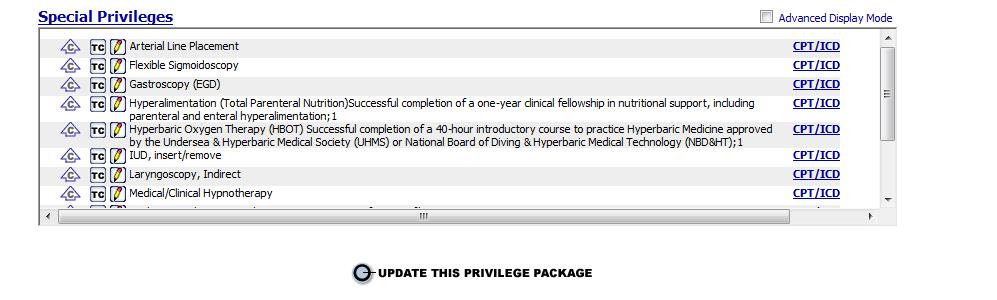
In the "Core Privileges" area of the page the specialist can perform the following options:
To
view all of the core privileges associated with the specialty select the
 link to open the "Specialty:
(Core Privileges)" page shown below.
link to open the "Specialty:
(Core Privileges)" page shown below.
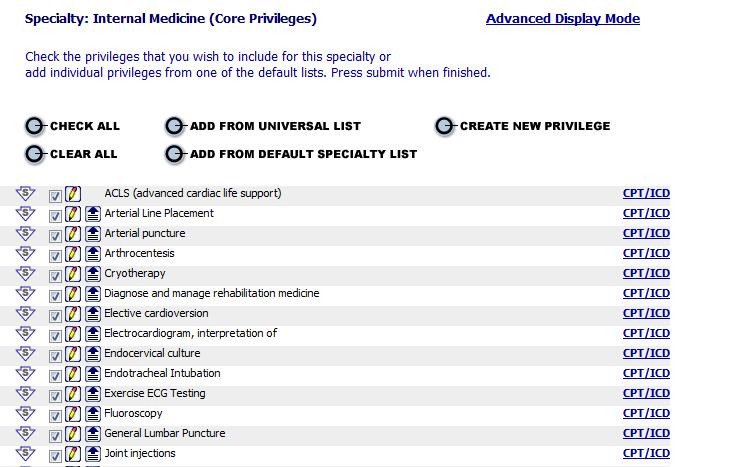
From the page shown above the specialist can perform the following tasks:
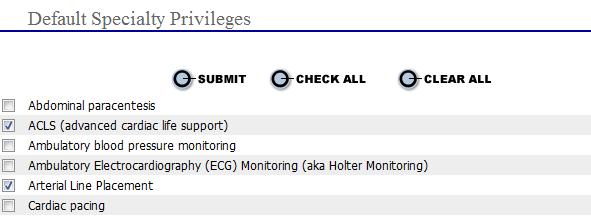
Add From Default Specialty List:
When
new privileges are added to a specialty (as noted in the Dashboard Newsletter)
they are found in the "Add From
Default Specialty List". Select
the  button to open the following page and perform the
following steps:
button to open the following page and perform the
following steps:
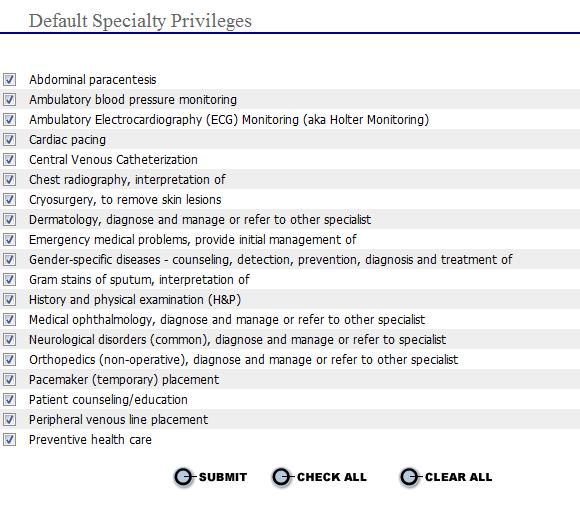
Select the  next to each individual privilege to add to the core privileges
for the specialty, or
next to each individual privilege to add to the core privileges
for the specialty, or
Select
the  to select all privileges to add to the specialty,
or
to select all privileges to add to the specialty,
or
Select
![]() to uncheck all privileges and restart
to uncheck all privileges and restart
Select the  button to save the core privilege additions.
Return to the "Specialty: (Core Privileges)" page. (The new core privileges selected will be displayed in the list).
Select the  at the top right to exit without changes and return to the
main "Privileges by Specialty"
page.
at the top right to exit without changes and return to the
main "Privileges by Specialty"
page.
Add From Universal List:
If
the privilege is not listed for the existing specialty privileges, then
select the  button. This
action will search the entire library for all privileges using a word,
or word fragment as entered.
button. This
action will search the entire library for all privileges using a word,
or word fragment as entered.
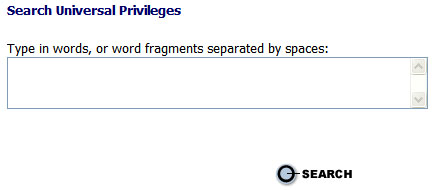
In the "Type in words, or word fragments separated by spaces" field enter a search criteria that applies to the specialty privilege (i.e., "diseases").
 Do not enter or hit the
space bar after typing in the search word.
Do not enter or hit the
space bar after typing in the search word.
Select the button to view the results in the "Universal
Privilege Search Results" page. Note
that the search results show the privileges in alpha order and also lists
the Medical Specialty in which
it is originally entered.
button to view the results in the "Universal
Privilege Search Results" page. Note
that the search results show the privileges in alpha order and also lists
the Medical Specialty in which
it is originally entered.

From the
privileges listed select the  next to each medical specialty
to add to the "Core Privileges"
next to each medical specialty
to add to the "Core Privileges"
Select the
 button to save the core privilege additions.
Return to the "Specialty: (Core Privileges)" page. (The new core privileges selected will be displayed in the list).
Select the
at the top right to exit without changes and return to
the main "Privileges by Specialty"
page.
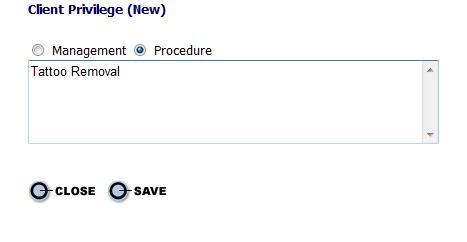
Create New Privilege:
If the privilege to
be added for the specialty is not listed in the "Add
From Universal List" or "Add
From Default Specialty List" then
the specialist will select the  button.
Select the  button to save the core privilege additions.
Select the  button to exit without changes and return to the main "Privileges by Specialty"
page.
button to exit without changes and return to the main "Privileges by Specialty"
page.
See Modify/Add Privilege ICD/CPT for newly created privileges.
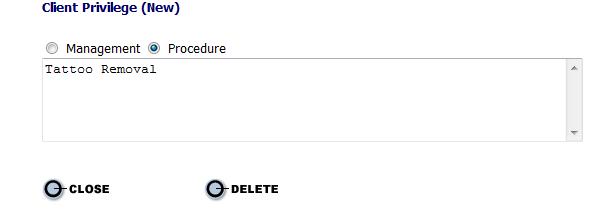
Remove Created Privileges
To
remove a privilege that has been custom created by the specialist, click
the button and locate the privilege to be removed.
Note
that there is no to "unclick" to remove the privilege
(privileges with a are from the EPR Privilege Library. Custom
created privileges from the facility will not "return" to the
EPR Privilege Library.)

The
specialist must choose the edit button to delete the privilege.
Choose
either or  .
.
Moving Core Privileges to Special Privileges
During the setup of the core privileges,
if the specialist finds that a core privilege has been added that should
be included as a specialty privilege then the specialist can select the
 option next to the privilege to move the privilege the
"Specialty Privilege"
area of the page.
option next to the privilege to move the privilege the
"Specialty Privilege"
area of the page.
The  option under the
"Specialty Privileges" area moves a specialty privilege to the
"Core Privileges" area.
option under the
"Specialty Privileges" area moves a specialty privilege to the
"Core Privileges" area.
Placing Privilege to Top of List
Choose
the privilege to be sorted to the top of the list by clicking the "Place this privilege at the top of the
list" button  . Click
the
. Click
the  at the top of the window to save the changes and
return to the Privileges By Specialty page.
at the top of the window to save the changes and
return to the Privileges By Specialty page.
To undo this action
click the of the privilege just below and move it to the
top. The
other privilege will then return to the list in alpha order.

Remove Privileges
Uncheck
the box(es) next to each privilege that is to be removed from the facility
privilege list. Click
to save changes. These
privileges have now been added to the "Default
Specialty List".

Undo Remove Privileges
To undo these changes
click  and choose the privileges to be added back the core
(or special) list and click .
and choose the privileges to be added back the core
(or special) list and click .
Creating a New Custom Privilege Grouping for Your Facility
The EPR system allows the Facility Administrator to Create a New Custom Privilege Grouping or Edit existing Custom Privilege Groupings.
To Create a New Custom Privilege Grouping Proceed to Step 1. Repeat the steps for each New Custom Privileging Grouping you wish to add.
From the "Medical Specialties" page click "Create New" at the bottom of the page to open the "Privileges by Specialty" page.
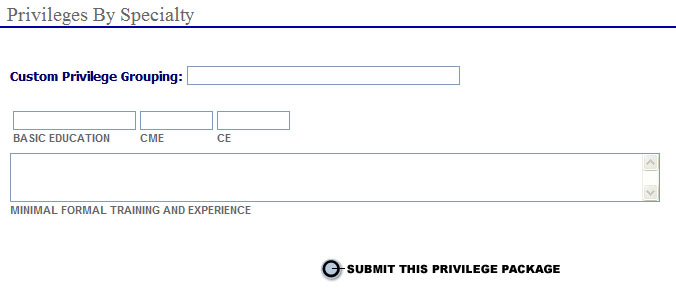
Enter the following information:
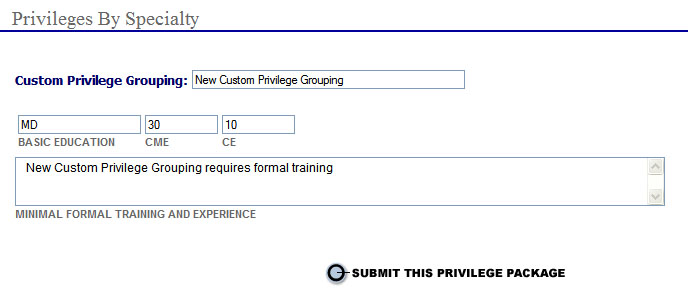
In the "Custom Privilege Grouping:" field enter a description for the custom grouping.
In the "Basic Education" field enter the basic level of education required for the custom privilege grouping.
In the "CME" field enter the total number of Continuing Medical Education hours required for the custom privilege grouping.
In the "CE" field enter the total number of Continuing Education hours required for the custom privilege grouping.
In the "Minimal Formal Training and Experience" field enter the minimum training and experience requirements for the custom privilege grouping.
Select
the  button to open the "Privileges
by Specialty" page.
button to open the "Privileges
by Specialty" page.
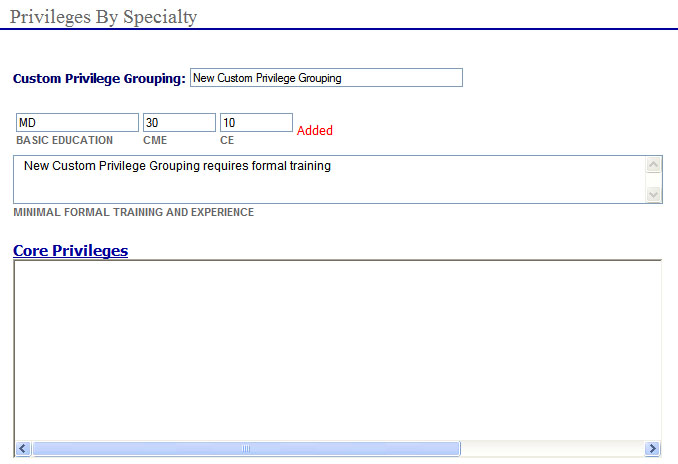
Follow the steps below to add the "Core Privileges" to the new custom privilege grouping:
Select the  link to open the "Specialty:
New Custom Privilege Grouping (Core Privileges)" page
as shown below:
link to open the "Specialty:
New Custom Privilege Grouping (Core Privileges)" page
as shown below:

Select the button to open the "Search
Universal Privileges" page.
button to open the "Search
Universal Privileges" page.
Enter the search
criteria and select the  button to open the "Universal
Privilege Search Results" page.
button to open the "Universal
Privilege Search Results" page.
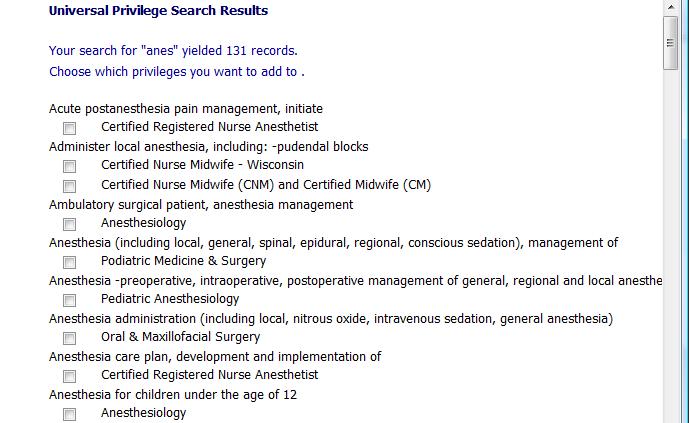
Choose which Privileges you want to add.
Select the  button to save the information and open the "Specialty:
New Custom Privilege Grouping (Core Privileges" page.
button to save the information and open the "Specialty:
New Custom Privilege Grouping (Core Privileges" page.
Repeat steps as necessary to Add From Universal List or Create New Privilege.
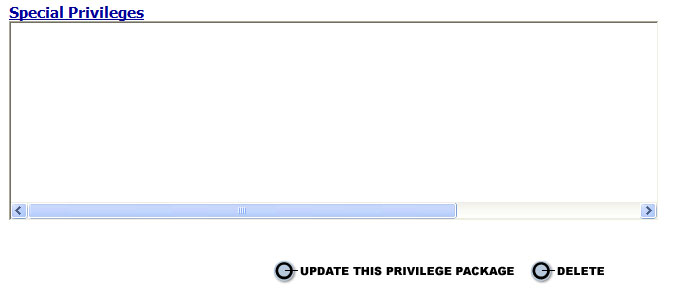
Follow the steps above to add "Special Privileges" .
When all "Core
Privileges" and
"Special Privileges"
have been added, select
the main menu item select "Facility
Admin" from the drop-down menu. The "Medical
Specialties" list displays.
The new custom privilege grouping will be displayed under the "Custom Privilege Grouping" section of the page.